Resize Property in Excel VBA
The Resize property in Excel VBA makes a range a specific number of rows and columns smaller or larger. The Resize property always takes the top left cell of a range as the starting point.
Contract
To contract the size of a range specify a smaller number of rows or columns than the original range.
Place a command button on your worksheet and add the following code line:
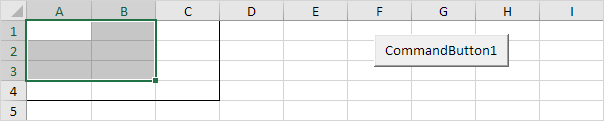
Range("A1:C4").Resize(3 2).SelectResult:
Explanation: this code line resizes Range("A1:C4") to 3 rows and 2 columns and selects this range (border for illustration only).
Code line:
Range("A1:C4").Resize( 1).SelectResult:
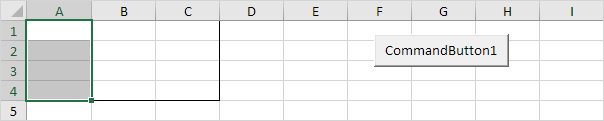
Explanation: this code line resizes Range("A1:C4") to 1 column (we omit any row specification) and selects this range.
ExpandTo expand the size of a range specify a larger number of rows or columns than the original range.
Code line:
Range("A1:C4").Resize( 5).SelectResult:
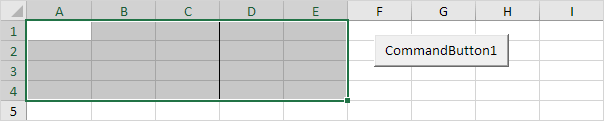
Explanation: this code line resizes Range("A1:C4") to 5 columns. The Select method selects Range("A1:E4").
Code line:
Range("A1:C4").Resize(10) = 99Result:

Explanation: this code line resizes Range("A1:C4") to 10 rows. Instead of using the Select method you can work with the resized range directly. For example set the values of the cells in the resized range to 99.
Written by
Jason Howie
Founder, FormulasHQ
A formula nerd with a passion for numbers and equations. Writes about Excel, Google Sheets, VBA, regex, and Salesforce formulas — for people who spend their day in spreadsheets.