Table of Contents
Drop-down List
Drop-down lists in Excel are helpful if you want to be sure that users select an item from a list instead of typing their own values.
Create a Drop-down List
To create a drop-down list in Excel execute the following steps.
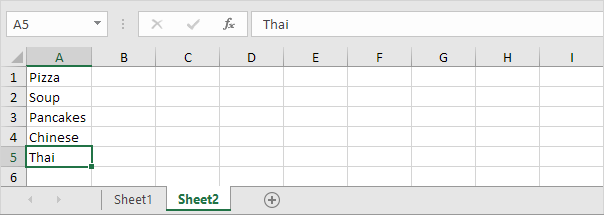
1. On the second sheet type the items you want to appear in the drop-down list.
Note: if you don’t want users to access the items on Sheet2 you can hide Sheet2. To achieve this right click on the sheet tab of Sheet2 and click on Hide.
2. On the first sheet select cell B1.
3. On the Data tab in the Data Tools group click Data Validation.
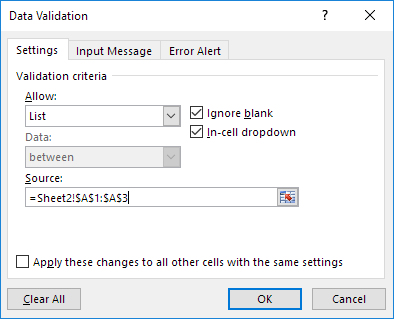
The ‘Data Validation’ dialog box appears.
4. In the Allow box click List.
5. Click in the Source box and select the range A1:A3 on Sheet2.
6. Click OK.
Result:
Note: to copy/paste a drop-down list select the cell with the drop-down list and press CTRL + c select another cell and press CTRL + v.
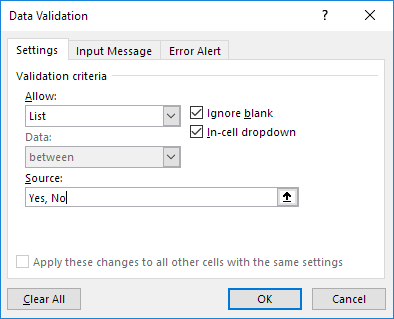
7. You can also type the items directly into the Source box instead of using a range reference.
Note: this makes your drop-down list case sensitive. For example if a user types yes an error alert will be displayed.
Allow Other Entries
You can also create a drop-down list in Excel that allows other entries.
1. First if you type a value that is not in the list Excel shows an error alert.
To allow other entries execute the following steps.
2. On the Data tab in the Data Tools group click Data Validation.
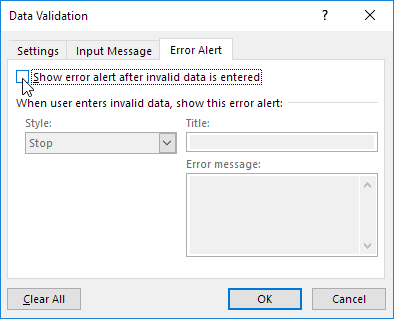
The ‘Data Validation’ dialog box appears.
3. On the Error Alert tab uncheck ‘Show error alert after invalid data is entered’.
4. Click OK.
5. You can now enter a value that is not in the list.
Add/Remove Items
You can add or remove items from a drop-down list in Excel without opening the ‘Data Validation’ dialog box and changing the range reference. This saves time.
1. To add an item to a drop-down list go to the items and select an item.
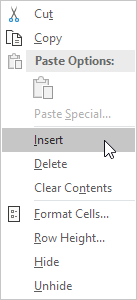
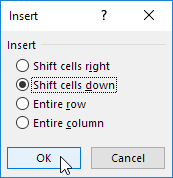
2. Right click and then click Insert.
3. Select “Shift cells down” and click OK.
Result:
Note: Excel automatically changed the range reference from Sheet2!$A$1:$A$3 to Sheet2!$A$1:$A$4. You can check this by opening the ‘Data Validation’ dialog box.
4. Type a new item.
Result:
5. To remove an item from a drop-down list at step 2 click Delete select “Shift cells up” and click OK.
Dynamic Drop-down List
You can also use a formula that updates your drop-down list automatically when you add an item to the end of the list.
1. On the first sheet select cell B1.
2. On the Data tab in the Data Tools group click Data Validation.
The ‘Data Validation’ dialog box appears.
3. In the Allow box click List.
4. Click in the Source box and enter the formula:
=OFFSET(Sheet2!$A$100COUNTA(Sheet2!$A:$A)1)
Explanation: the OFFSET function takes 5 arguments. Reference: Sheet2!$A$1 rows to offset: 0 columns to offset: 0 height: COUNTA(Sheet2!$A:$A) and width: 1. COUNTA(Sheet2!$A:$A) counts the number of values in column A on Sheet2 that are not empty. When you add an item to the list on Sheet2 COUNTA(Sheet2!$A:$A) increases. As a result the range returned by the OFFSET function expands and the drop-down list will be updated.
5. Click OK.
6. On the second sheet simply add a new item to the end of the list.
Result:
Remove a Drop-down List
To remove a drop-down list in Excel execute the following steps.
1. Select the cell with the drop-down list.
2. On the Data tab in the Data Tools group click Data Validation.
The ‘Data Validation’ dialog box appears.
3. Click Clear All.
Note: to remove all other drop-down lists with the same settings check “Apply these changes to all other cells with the same settings” before you click on Clear All.
4. Click OK.
Dependent Drop-down Lists
Want to learn even more about drop-down lists in Excel? Learn how to create dependent drop-down lists.
1. For example if the user selects Pizza from a first drop-down list.
2. A second drop-down list contains the Pizza items.
3. But if the user selects Chinese from the first drop-down list the second drop-down list contains the Chinese dishes.
Table Magic
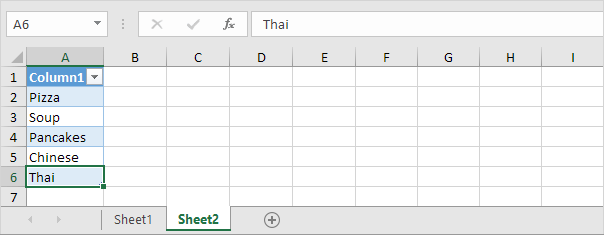
You can also store your items in an Excel table to create a dynamic drop-down list.
1. On the second sheet select a list item.
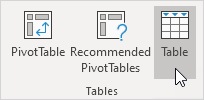
2. On the Insert tab in the Tables group click Table.
3. Excel automatically selects the data for you. Click OK.
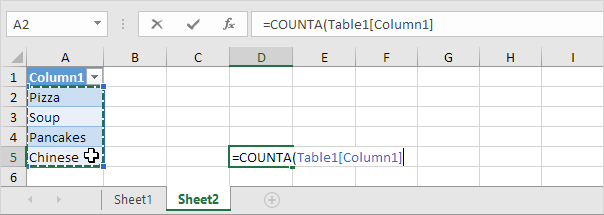
4. If you select the list Excel reveals the structured reference.
5. Use this structured reference to create a dynamic drop-down list.
Explanation: the INDIRECT function in Excel converts a text string into a valid reference.
6. On the second sheet simply add a new item to the end of the list.
Result:
Note: try it yourself. Download the Excel file and create this drop-down list.
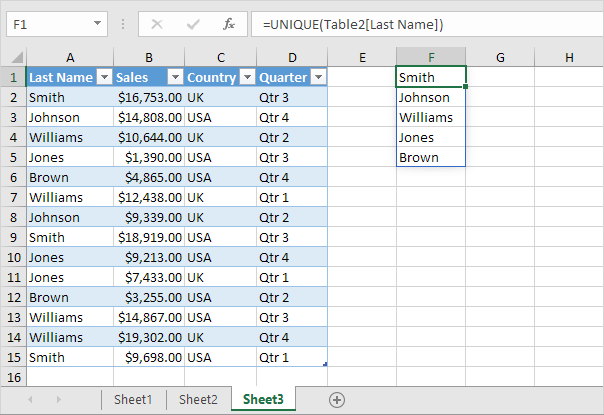
7. When using tables use the UNIQUE function in Excel 365/2021 to extract unique list items.
Note: this dynamic array function entered into cell F1 fills multiple cells. Wow! This behavior in Excel 365/2021 is called spilling.
8. Use this spill range to create a magic drop-down list.
Explanation: always use the first cell (F1) and a hash character to refer to a spill range.
Result:
Note: when you add new records the UNIQUE function automatically extracts new unique list items and Excel automatically updates the drop-down list.
Join over 1 million Excel learners by following Excel Easy on Facebook X and LinkedIn.


