Table of Contents
Data Form
The data form in Excel allows you to add edit and delete records (rows) and display only those records that meet certain criteria. Especially when you have wide rows and you want to avoid repeated scrolling to the right and left the data form can be useful.
1. Open the downloadable Excel file.
2. Add the Form command to the Quick Access Toolbar.
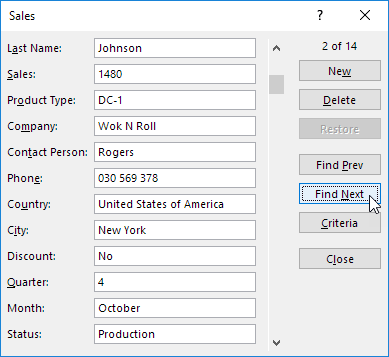
3. Click the Form command.
4. Use the Find Prev and Find Next buttons to easily switch from one record (row) to another.
Note: use the New or Delete button to add or delete records. Once you start editing a record you can use the Restore button to undo any changes you make.
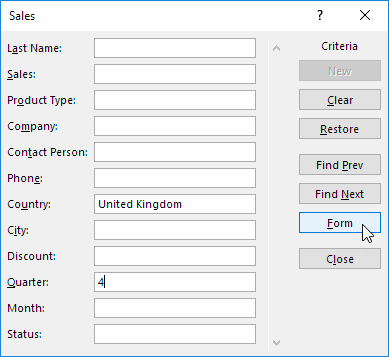
5. To display only those records that meet certain criteria click the Criteria button.
6. Enter the criteria and click the Form button.
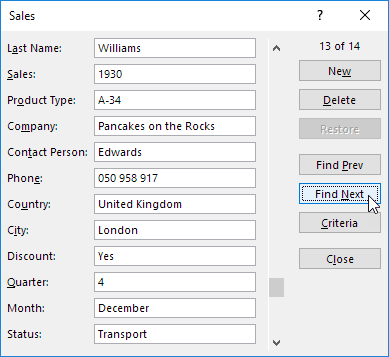
7. Now when you use the Find Prev and Find Next buttons you will only see those records that meet these criteria. In our example only record 13.
Note: to edit the criteria click the Criteria button again. To close the data form click the Close button.
Tip: use VBA to create awesome Userforms in Excel.

