Table of Contents
Meal Planner
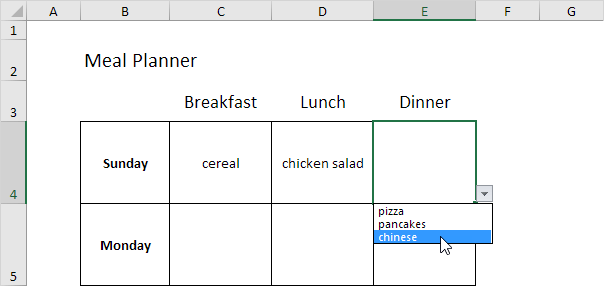
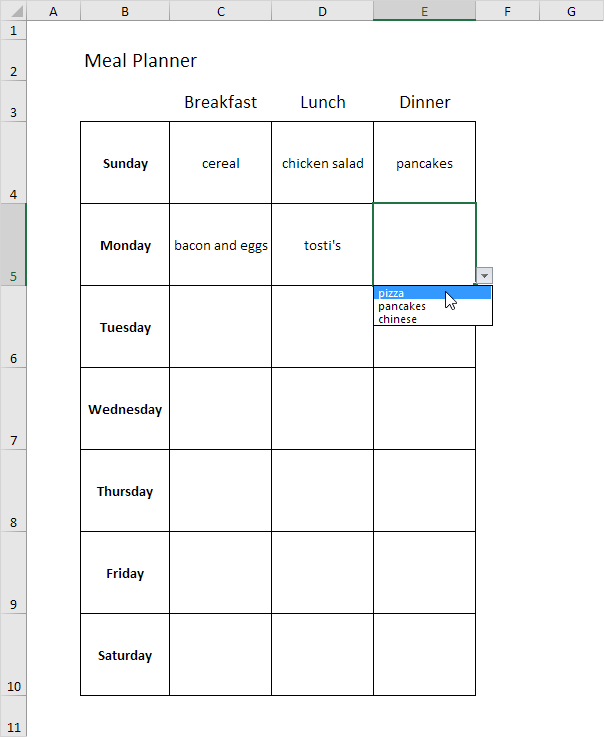
This article shows you how to create a meal planner in Excel. Here’s what we are trying to achieve:
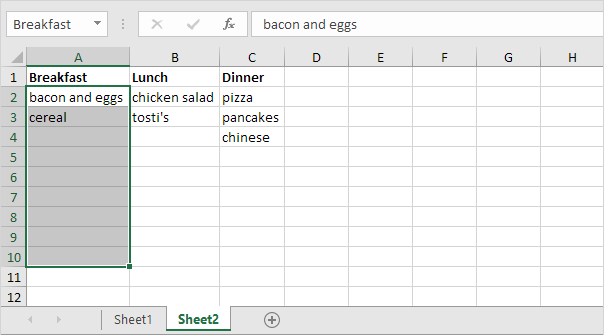
1. On the second sheet create the following named ranges.
| Name | Range Address |
|---|---|
| Breakfast | A2:A10 |
| Lunch | B2:B10 |
| Dinner | C2:C10 |
Note: you can add 7 more breakfast meals in the future without changing the range address.
2. On the first sheet select cell C4.
3. On the Data tab in the Data Tools group click Data Validation.
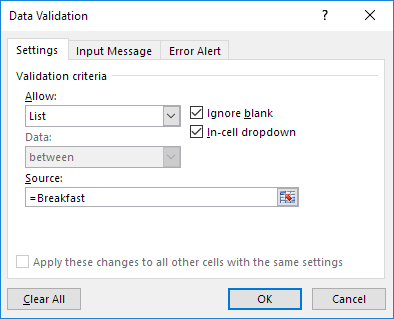
The ‘Data Validation’ dialog box appears.
4. In the Allow box click List.
5. Click in the Source box and type =Breakfast.
6. Click OK.
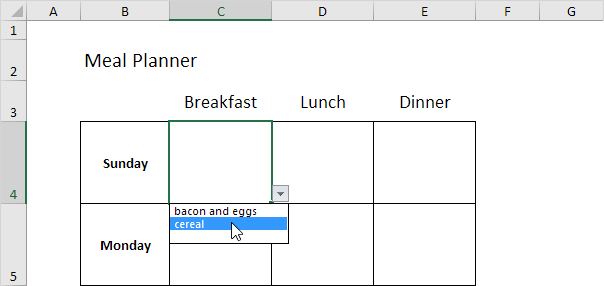
Result:
7. Repeat steps 2 to 6 for cell D4 and cell E4 but instead of the Breakfast reference use the Lunch and Dinner reference.
8. Select the range C4:E4 and drag it down to row 10. This will copy the drop-down lists to the other days.
Result:
